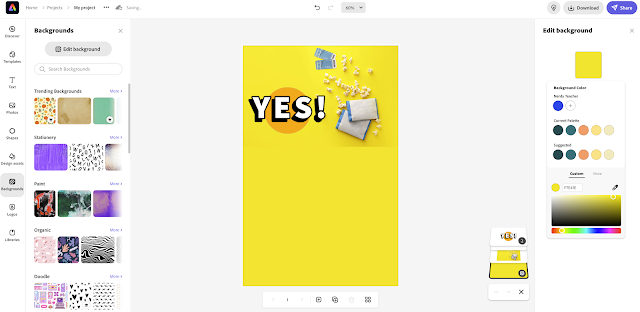
Today, we're excited to introduce you to Adobe Express, a powerful yet user-friendly tool for creating eye-catching visuals, perfect for social media, websites, or presentations. With an easy-to-use interface and an extensive range of features, Adobe Express is perfect for both beginners and experts alike. In this post, we'll walk you through one of its most popular features - creating custom graphics. Let's dive in!
Step 1: Open Adobe Express and Select a Template
To get started, head over to the Adobe Express website (https://www.adobe.com/express/) and sign up for a free account. Once you're logged in, you'll find a wide array of templates to choose from. These templates are organized by theme and purpose, making it easy to find the perfect starting point for your design. Select a template that best fits your needs and click on it to open the editor.
Step 2: Customize the Text
One of the first things you'll notice in the editor is the pre-existing text, which you can easily customize to suit your needs. Simply click on the text box and start typing your own content. To change the font, size, color, or alignment, use the options provided in the toolbar above the text box. Feel free to experiment with different styles until you achieve the desired look.
Step 3: Add Images and Icons
To make your design truly unique, you can add images and icons from Adobe Express's extensive library. Click on the "Add" button in the left-hand toolbar and select "Photo" or "Icon" to search for the perfect addition to your design. Once you've found the right image or icon, click on it to add it to your graphic. You can then resize, rotate, or reposition it as needed.
Step 4: Customize the Background
Adobe Express allows you to customize the background of your design with colors, gradients, or even images. Click on the "Background" option in the left-hand toolbar and choose between "Color," "Gradient," or "Photo." You can select a color from the palette, create a custom gradient, or search for a background image that suits your design.
Step 5: Save and Share Your Creation
Once you're satisfied with your design, it's time to save and share it. Click the "Share" button in the upper-right corner of the screen and select the desired file format (JPG, PNG, or PDF). You can also choose to share your design directly to your favorite social media platforms or via a unique link.
And that's it! With just a few clicks, you've created a stunning custom graphic using Adobe Express. Whether you're designing social media posts, website banners, or presentation slides, this powerful tool makes it easy to create professional-looking visuals that leave a lasting impression. So, go ahead and unleash your creativity with Adobe Express!


No comments:
Post a Comment
Please post your thoughts here. Thanks!